Your iPhone can take fantastic photos, but pulling them from your phone can be a bit of a hassle.
When I say a bit, I mean it’s one of the most frustrating things that iOS users have to deal with. Apple makes it an egregious process.
I wanted to know how to transfer photos from iPhones to laptops and PCs without needing aspirin afterwards, because I know I’m not the only one that dreads the import process.
In the end, I came up with six different ways that you can do this without sacrificing image quality, and without spending too much time.
No products found.
On top of that, I’ll go over the traditional way that you transfer photos from your iPhone to your PC.
How do I Transfer Photos from my iPhone?
There are five wireless solutions, and two wired solutions that you can use while avoiding iTunes.
We’re going to go over every single one of them with as much clarity as possible, so you can just go right into your iPhone and transfer everything out.
Each method will have numbered steps to make this as painless a process as possible.
Wireless Solutions
If we can avoid attaching wires and cables, then that’s exactly what we’re going to do.
Thanks to a lot of services and wireless connection methods, you have a lot of options are your fingertips.
Let’s explore the top five.
The most obvious solution would be to email yourself the photos, but it can be pretty time-consuming.
If you’re serious about iPhone photography, then you’re probably shooting in 4K resolution, raw formats, and possible even ultrawide shots or panoramic.
That’s all well and good, so long as you don’t exceed the maximum allotted email attachment size.
If you use Gmail for this, you can send up to 25MB worth of attachments in a single email, as long as it’s going to another Gmail user (which could just be a second email account of yours).
Here’s how to do it.
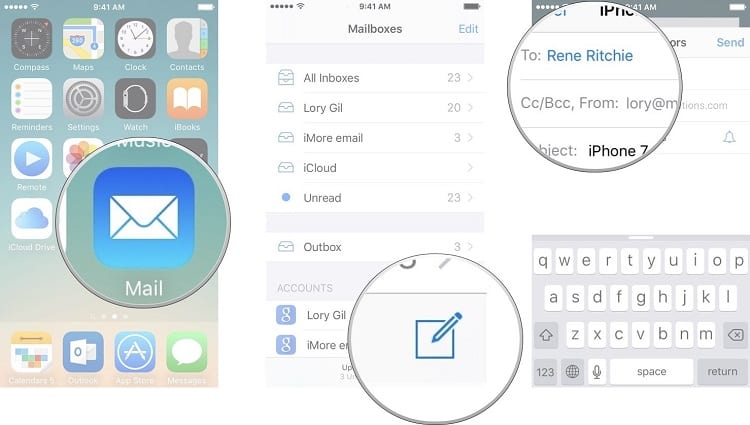
- Open your email app. For large files, use Gmail to take advantage of all its features.
- Tap on the paperclip attachment icon. This should be located along the bottom of your screen before you open up your keyboard. If you tap on the body of the email and begin typing, it will make the icon vanish temporarily.
- Go through to your camera roll once the file explorer opens up. Sort by date if you took the photos very recently, and you’ll see a date-based listing style to make it easy to access your photos. Otherwise, go into your camera roll and manually select them.
- Wait for your files to upload to Gmail. This could take some time to attach.
- Put a subject with the date and what the email includes. Something simple like “01/01/2020 – [3 Photos]” would do, or however many photos you’re sending. I say this because if you’re like me, you’re going to lose this email somewhere. Just type photos into your Gmail search bar, and you’ll get a whole list of pre-organized emails with photo attachments.
- Go onto your PC and open your email messages.
- Hover over the attachment icon in your email (which should be a preview of the photos), and click on the download arrow. This will send it to your download folder. Now they’re on your PC.
Just keep in mind that whenever you do this, it could take a while if you have wide photos in a raw format.
If you’re taking pictures while you’re on-site, set up a few emails while you’re between shoots so that you can get a jump on submitting large photos to yourself.
Just be sure that your data plan will allow for it.
Messaging App

While email has a few benefits, you can use a messaging app to do the dirty work for you.
The most popular that comes to mind is Facebook Messenger, which allows up to 25MB per attachment, and you don’t have to make a ton of emails to send these to yourself.
The only thing is, you need a person to send them to so that you can rip them from the chat later.
You can also use a messenger called Wire, which has some pretty lenient allowances for maximum MB size.
Either way, this will work the same on most messengers.
- Open up your app and load up a message with someone who you can send these photos to. If you get crafty, you can either find a messenger that allows you to message yourself (like Slack), or you can just make another profile to message. Whatever works.
- Tap on the attachment icon, which will usually be a paperclip. This will open up an internal menu where you can select the photos that you want to transfer.
- Tap on the photos, or hold one down to allow a checkmark menu to pop up. You can check multiple files here. Depending on the app you’ve chosen, they might send all at once, or the app might send them one by one depending on the file size. Either way, if you can select them all at once, it’s going to save you a lot of time.
- Open them on your PC, and enlarge each photo individually. Click on the download arrow, and send them straight to your downloads folder. You can access them here.
The main downside to using messenger apps is that you have to go in and individually download each file.
Yes, you have to do that with emails as well, but at least they’re all in a neat and tidy column or row.
Here, you have to enlarge each photo and find the download button. Just some food for thought.
Cloud Storage
You can use iCloud, or any other cloud service that has an iOS app or access, to put your photos on.
Since most of these services will also have a Mac or PC application or web service, you can simply access them and download files in their original format.
Because of the way these cloud services are, you don’t have to compress your files or get a lower resolution when you download them.
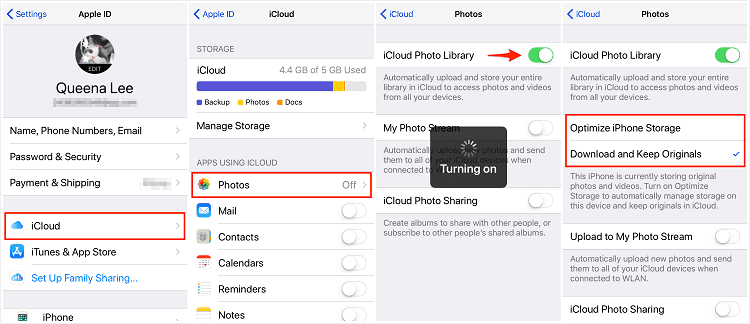
- Download and open iCloud for Windows, and sign in with your Apple ID.
- Once you’re signed in, click on your options menu. You’re going to find a box called “iCloud Photo Library.” Check that off and hit apply.
- On your iPhone, go to iCloud Photo Sharing, which may also be labeled as Shared Albums. From here, you can customize where your photos will automatically be sent to on your iCloud account.
- Go to your individual photos, and click upload in the menu (this needs to be done per photo).
- Enable the folder you created in Windows for your photographs, then return to your PC.
- Check your device to see if everything has synced up properly. If you photos are not visible and downloadable through iCloud for Windows, then you may need to use their troubleshooting guide to ensure your device is enabled properly.
Just keep in mind that some cloud services cost money to upkeep a subscription for.
If you’re taking a lot of iPhone photographs and want to avoid iTunes altogether, then it’s worth it for a monthly package deal.
You can usually get away with the base model for under $10 per month.
File Services
There’s cloud storage, and then there are file services, which operate a bit differently.
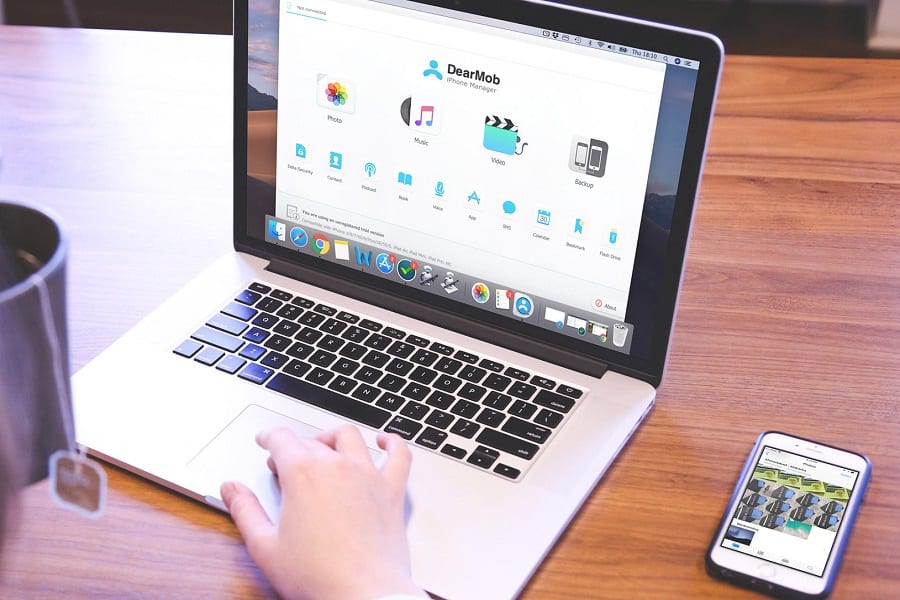
Instead of trusting your photographs with iOS apps (which can sync up to iTunes can end up messing with your data, restoring old versions, etc.), you can use a file sharing service just as Dropbox.
Dropbox is always spotted offering free GBs worth of storage space that come with signing up for other services.
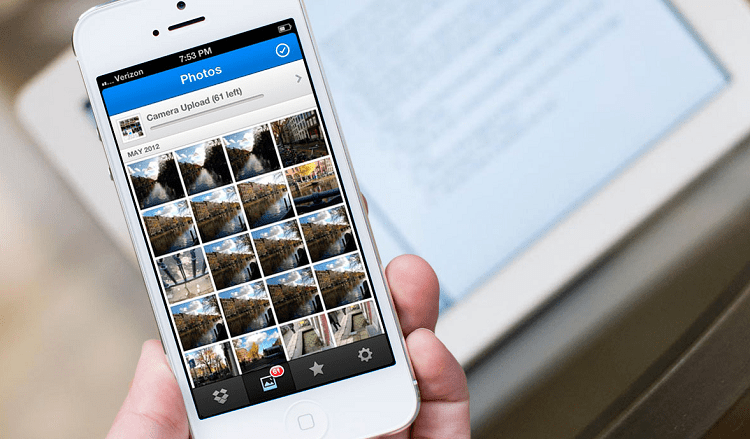
- Download Dropbox on your iPhone and create a login. Enter your username and password to access your Dropbox account.
- Create or open a Dropbox folder where you want to store all of your photos. If you’re doing specific photo dumps, it’s wise to name these and mark their date ranges of when the photos were taken for easier organization later.
- On the bottom of your screen in the Dropbox app, you can tap the plus symbol and begin uploading your photos. Choose which photos you want to upload. Note: you can select more than one at a time.
- On the iOS app, you will tap “Next” at the bottom of the screen. Even though we set aside an entire folder for this, you still have to choose which folder you want everything to be deposited into. Find it, select it, and then press “Set Location.”
- Tap upload, and you’re good to go.
While Dropbox is the number one service that comes to mind, it should be noted that if you’re uploading to Dropbox so that you can access it on Windows, there’s a bit of an issue transferring video files.
You can also explore other similar file sharing services, such as Google Drive, Amazon Drive, OneDrive, CloudMe, or SugarSync.
Bluetooth Casting
This one is not ideal, which is why it’s on the bottom of the list. It works, but it’s going to affect the resolution of your photos on occasion.
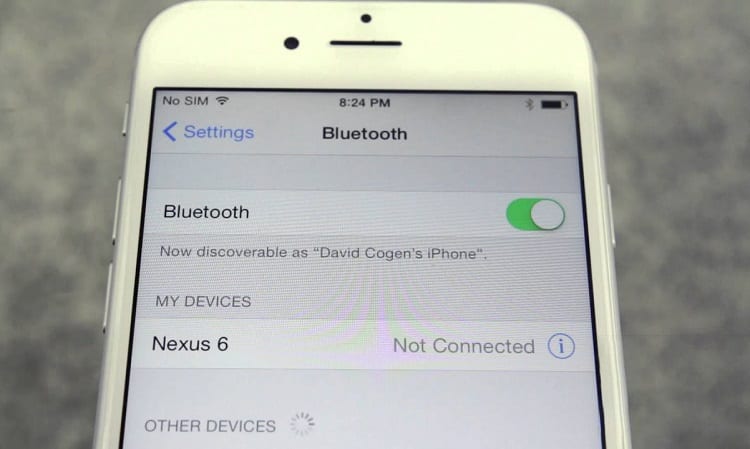
- Connect your PC to your iPhone via bluetooth. Establish the connection and ensure everything is A-okay.
- Use bluetooth to stream photos from your iPhone to the Photos app (viewing app) on Windows. From here, you should be able to either cast from your device to the screen, or use Windows to explore the files on your iPhone.
- If you can explore files directly, you may be able to download them directly through casting. If not, you can right-click “Save As” when viewing a photo, or a download icon might appear at the top-left of the screen.
- If all else fails, go to fullscreen mode and ensure the photos are displaying at their true size. You can then use your keyboard to take a screenshot of the photo, and crop the black bars off of the left and right later on.
The reason this isn’t preferred is because you’re effectively just using pngs or jpegs of your photos through a screenshot.
If your goal is to transfer photos in a raw file format for better post-production editing, this is going to get in the way of that.
You can still edit these photos, just not in the same way.
Wired Options
It’s a little more involved, but still entirely doable without having to launch iTunes and go through that whole syncing process.
Syncing often ruins photos by either encountering errors, or erasing them from your iPhone before everything is properly transmitted.
It’s a mess, so let’s use some wires to handle it instead.
USB Cable
Directly connecting your iPhone to your PC via a USB cable will allow you to open the files and sort through your layers of folders.
It can take some getting used to, but after you find the pathway to your camera roll, it will be easy the next time.
- Connect your lightning cable to your USB adapter, and plug the male end into your PC.
- Explore the device profile that pops up as soon as possible. Right-click and open/explore to find a list of folders.
- Use this to locate your camera roll, and switch your view. You can right-click on the background of the folder and hover over “View,” where you can then select a file icon size. This allows you to see enlarged previews of your photos. From here, choose which ones you want and then copy them to your desktop folder.
You have to be careful to avoid linking up with iTunes services when you connect via USB.
Even though you’re slipping past them with a lightning to USB converter, it might still pick up on your phone’s signature.
Removable MicroSD Card Reader
Your iPhone is using internal memory.
One of the best things about the iPhone 11 is that you can get up to 512 MB of internal space, which is pretty insane for a smartphone.
But then all of your photos are locked on that internal memory. Unless you slip a MicroSD card in to retrieve all of that information.
- Connect your MicroSD card to your iPhone via the correct port.
- Go into your camera roll and select where you want photos to be saved to. From here, you can select your MicroSD card.
- Copy files over to it.
- Remove it from your iPhone and plug it into a MicroSD adapter in your PC. Most newer PCs come with these built right into the front of the tower panel, but laptops may need the adapters.
- Copy files from the MicroSD card to your desktop or wherever you want to store your photos.
How Can I Transfer Photos from PC to iPhone Without iTunes?
The number one way to do this is by disabling iTunes from your Windows PC before you plug your device in.
Before you do that, turn off device syncing to be doubly sure.
If you’re still worried about this, you can remove iTunes altogether and just download it again at a later date if you’d like.
The main reason that iTunes is a problem for syncing photos is that they can remove them from your iPhone and put them on your PC, but they don’t copy the files.
One little corruption can send hundreds of photos into the recycling bin in no time.
Plug in your iPhone after disabling iTunes, and copy your files to a safe folder.
How to Move Photos from an iPhone to a MAC
You can use just about any of the methods outlined here.
If you’re using a USB cable, then you’re going to have to bypass iTunes if you don’t want it to enact when you plug everything in.
You can use iCloud, but to avoid any syncing and removal of photos from your phone, I recommend using one of the file sharing services that I outlined earlier.
This way you have a whole folder of copies, as well as the originals on your iPhone/.
It Isn’t Easy, But It’s Doable
Apple has a tendency to make these things more difficult than they ever needed to be, but with some quick solutions like the ones we’ve outlined here, you’ve got a way to transfer photos without all of the headache that usually follows.
There are less-than-practical ways to get around iTunes important your photos or using a cloud, but they involve third-party software that we personally cannot verify the validity of, and are actively against it.
You can search for those on your own terms if you’d like, but it’s best to take safer routes.