It’s coming—the dreaded passport photo.
Nobody looks forward to this, but everybody stresses out about it.
You’re going to have to set things straight and get down to business, so let’s talk about it.
Passport size photos can actually save you a ton of money.
Yes, there are stipulations on the way you take them, but with the right setup and backdrop, you can take it yourself and not have to fork over a ton of money to the government.
From sizing to some hidden tips and tricks on taking the right photo, this is what you need to know.
Contents
Some US Passport Photo Guidelines

If you’ve never applied for a US passport before, you’re in for a real treat.
There are a lot of stipulations, and while we don’t have time to dissect every single one of them, we want to go over the most important before we get into actually taking the photo.
After all the work that goes into taking your photo and printing it out is done, the last thing that you want is to be rejected for a passport and have to redo the entire thing because of a picture.
- No branded clothing or work uniforms. Avoid logos and lettering on clothing; just wear your normal everyday clothes. Your passport photo might be rejected if you’re wearing your work uniform in it.
- No hats at all. Even if you’ve recently gone the shaved head route and want to look professional in your photo, you can’t have anything obstructing the view of your head or face.
- You can smile, but keep it within reason. A simple full smile will suffice; you don’t need to look like you’re laughing at a funny joke in the photo.
- You absolutely have to have a white or cream-colored backdrop behind you so that it will appear vibrantly and clearly on your US passport.
Okay, now that those boring points are out of the way, let’s get into the actual photo-taking process and see what we’re going to need.
How to Adjust Your Camera to Take Exact Photos?
Now comes the fun part; using your camera to take your photo properly.
You’re going to need a good tripod that can hoist your camera up high, and some patience as well.
- Position your tripod so that one of the legs is pointing towards the backdrop or place where the photograph will be taken. This allows for someone to stand behind the camera and actually take the picture without bumping into anything (hopefully) and ruining the shot.
- Check if it’s level. If your tripod doesn’t come with its own leveling bubble, that’s okay: you can buy a cheap leveler from your local hardware store for a few dollars. Position it on top of your camera to ensure it’s nice and even. This will even out your shot as well.
- Enable grid mode on your camera or phone. You want the bottom of the central square in the grid to be chest-level, while your head stays in the confines of that center box. This is just going to make it a lot easier when you have to crop your photo later.
- Disable all filters. If you have a preserve mode on your iPhone or your digital camera, you want to disable all of those. The government wants a clean photo with a clear background, so sepia tones, black and white and blue hues could end up getting you rejected for your photograph alone.
- If you know that your lighting is all set to go, it’s time to mess with your exposure.These settings can really take good lighting and throw it in the garbage can, and if you’ve disabled filters that you previously enjoyed, it could throw off the white balance.
- Either get someone you trust to take the photo, or use a bluetooth remote control that came with your tripod to take the photo. Consider using burst mode.
Tips for Being Photogenic

Driver’s license and passport photos used to look like mugshots, no matter who you were.
Thankfully, the US government has budged a bit, because now you’re allowed to smile.
Here are a few tips to be more photogenic without invalidating your photo.
- Use burst mode. Consider clicking it on so it initiates the photo stream, then smile, and be sure to keep your eyes open. This mode usually catches a half-smile during the photo burst, and it might end up looking better than the full smile at the end.
- Don’t take a photo while you’re nervous. Goosebumps on your neck and shoulders can stand out in a photo and make you feel self-conscious. Instead, walk around the house for a minute, and consider using a remote to take the picture if having a friend running the camera makes you nervous.
- Put on your favorite song in the background. You can’t have earbuds or headphones in your photo, but if your favorite song is playing in the background while you take your pictures, it could be enough to help keep you in a good mood the whole way through.
All About Lighting for Your Passport Photo
Lighting will make or break a photo.
It can show off someone’s beauty in a photograph or make a landscape come alive, but when it comes to your passport, sufficient lighting could be a dealbreaker for your application.
You have to approach it the right way.
Your face has to be lit up enough that your features are visible and not shrouded, but not so bright that there’s a reflection coming off of your glasses or face.
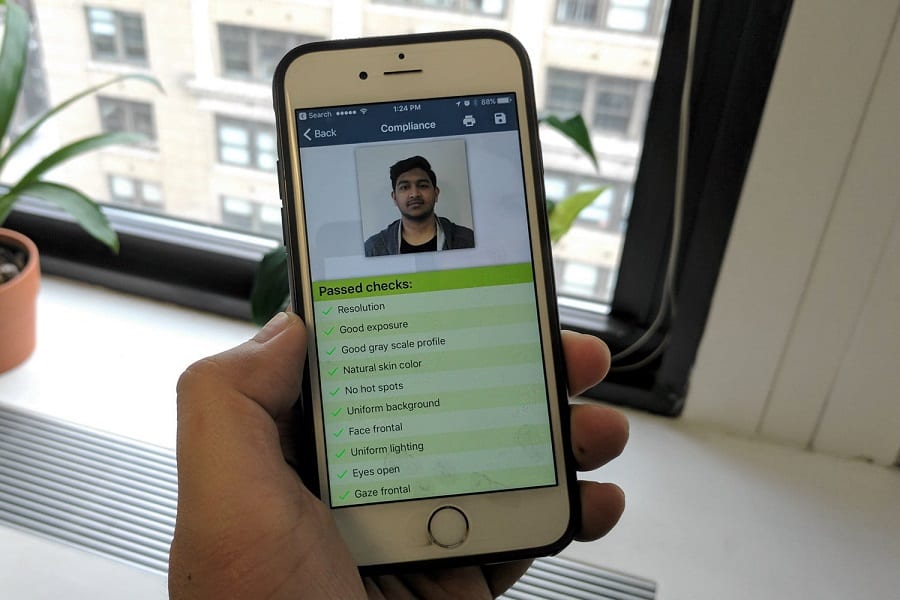
If you’re taking photos with your iPhone, now would be a good time to get a third-party camera app that helps you handle white balance while taking a picture.
This can help with exposure and handling the amount of light.
Another thing that you should have is a ring light.
These are traditionally used by a lot of photographers that do headshots, as well as vloggers and YouTubers for the best possible lighting in an intimate one-on-one photo.
Don’t ride or die by a ring light though; explore all options, such as soft boxes, so that you can eliminate that white light halo around your face.
If you’re feeling a bit odd about all of this, you can always use a tripod with a bluetooth controller to take your photo instead of having someone come over to help you.
How to Resize Your Photo if You Don’t Have a Photo Editor Tool

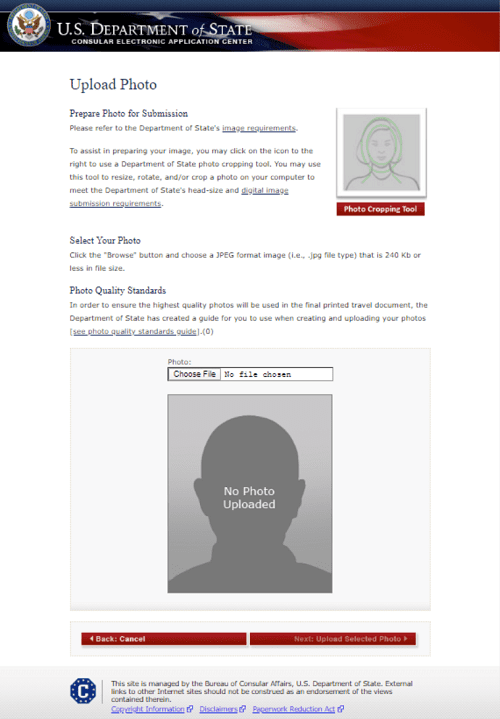
First thing’s first: head over to this government website to use their cropping tool.
This puts your photo into a 2” x 2” format, but it also does something else that makes your picture more likely to be accepted on your first application.
They have a tool that creates a green oval around your head, so that you can frame your face directly where the US Department of State wants it to be.
This will mimic just about every professional standard that they have in place when they take photographs of you if you go into their office.
Start there. If you’re noticing that the photo came out a bit wonky (sometimes 2.15” x 2.21” for example), then you can open up Microsoft Word on your PC or laptop to resize the image.
If you don’t have any of those things, you can use Microsoft Word on your tablet/phone by downloading it for free.
Highlight the photograph and select the resizing option (located on the main tab for PC/laptop users).
Set it to 2” x 2” exactly, and align as many photos as you can on this so that when you print it out on photo paper, you get as many photos as possible without having to do this again.
What Are the Optimal Sizes for US Documents?
If you’re attaching your photograph to any US documents—namely, passport applications—your photo should be two inches by two inches.
You can then staple your photo to the appropriate box on your US passport application.
As a general rule, you’re going to want to use 2” x 2” photos for just about everything.
You can print out a batch of these for a few dollars and use scissors to cut them from big sheets of paper as you need them.
Be ready for Anything
While these specs don’t often change, understanding how to work your iPhone or Android smartphone and adjust the picture size will be important moving forward.
Passport photos are always going to be annoying to do, but just think of it this way: your phone now is already taking great pictures, but in ten years, who knows where we’ll be with photography equipment built into our phones?


